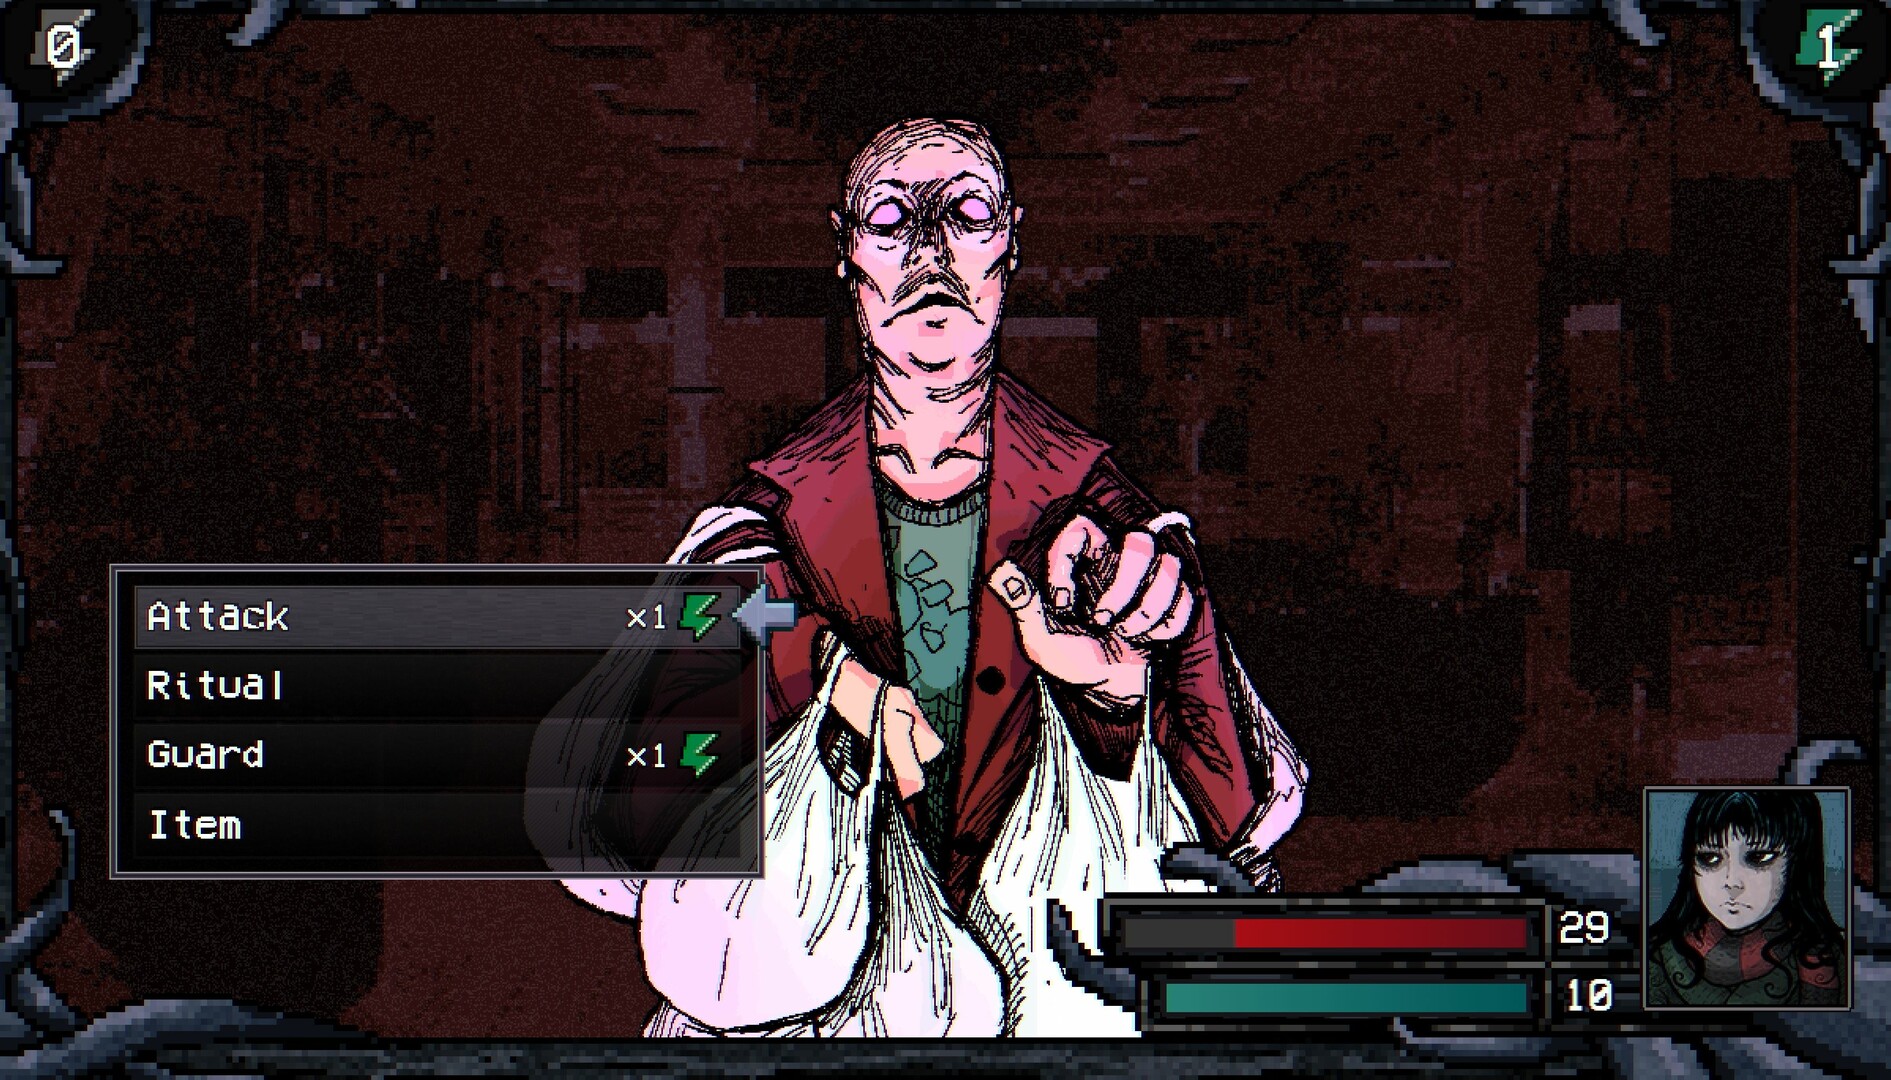
Read the fight before choosing an action
Your first job in an unfamiliar Elderfield battle is to work out what can kill you before you act again. Look at your current health, available actions, remaining magic, active effects, and the number of enemies still standing. A weapon upgrade matters less than noticing that two opponents can both attack before your next opportunity to heal. Pause at the decision screen and read the available commands. This is a turn-based RPG, so there is no advantage in rushing the menu as though you were dodging an attack in real time.
Make your opening objective small. Against an ordinary creature, the objective might be to learn how much damage its normal attack causes. Against several enemies, it might be to remove the weakest attacker before the group takes another turn. Against a new boss, it might be to observe one complete sequence without spending your rarest items. These are different jobs and deserve different actions. A plan that kills a weak monster efficiently can be a poor plan for collecting information from an unfamiliar encounter.
Do not treat a familiar portrait as a promise of familiar statistics. The regional encounter reference groups variants with the same name because their base values can differ. Check the location and enemy version before relying on a previous result. If an attack that used to be harmless suddenly removes a large share of your health, stop following the old sequence. The useful comparison is this enemy in this area against your present equipment, rather than a remembered fight from the first few days.
| Situation | First question | Useful response |
|---|---|---|
| Several enemies remain | Can one target be removed reliably? | Focus damage to reduce incoming actions. |
| Health is unsafe | Can you survive until another recovery action? | Recover or protect the next turn. |
| Magic is running low | Does this enemy need an expensive action? | Use a cheaper reliable option when safe. |
| An action behaves unexpectedly | What does the combat log show? | Inspect the effect before repeating it. |
Separate health, magic, and action economy
Health determines whether you survive. Magic determines which special actions remain available. Action Points determine what you can do during a turn. These resources interact, but they are not interchangeable. An inventory full of restorative food is of little use if your plan leaves no opportunity to use it. Equally, a powerful ritual is not a solution to every battle if spending its magic leaves you unable to respond to the next dangerous encounter on the route.
Before confirming a command, ask what the battle will look like immediately afterward. If the attack succeeds, does an enemy die or merely lose some health? If it misses, can you still recover? If you spend your remaining magic, is there a reliable basic attack available? These questions prevent a common mistake: evaluating an action only by the size of its damage number. The strongest action is often the one that leaves a safe and useful next decision.
Use a hypothetical example to understand the tradeoff. Suppose an enemy has enough health to survive your strongest attack, while your own health cannot withstand its next hit. Attacking produces an impressive number and a defeat. Healing produces no damage, but buys another turn in which you can finish the fight. The exact numbers change between builds and encounters; the decision does not. Survival has a practical value because every future attack depends on being alive to choose it.
Remove enemy turns, not just enemy health
When several targets are present, concentrate reliable damage where it removes an attacker. Dividing damage evenly across a group can leave every enemy alive and able to act. Focusing one target can reduce the amount of incoming pressure even when your total damage is lower. Start with an opponent you can finish safely, then reconsider the remaining group. A dangerous support effect may change that priority, but you need to observe the effect before treating the support creature as automatically more important.
This also explains why predictable damage is valuable. A weapon with an impressive maximum result can perform poorly if its accuracy penalties repeatedly leave an enemy alive. When comparing two options, count how many enemy turns you allow before the battle ends. A smaller hit that reliably finishes the target may save more health and food than a larger attack that occasionally misses. Keep critical hits as useful upside until your ordinary results are strong enough to support the plan.
Multi-target properties need the same care. An extra strike against a random enemy can help, but random damage is not equivalent to choosing the exact target you need removed. Read whether a property applies to basic attacks, damaging skills, or rituals. Then decide whether the current encounter actually contains multiple eligible targets. A property that shines in a crowded battle may contribute nothing against a lone boss, so do not judge the entire loadout from one spectacular group fight.
Use the combat log to answer one question
The developer added a combat log in the historical v0.2.6 update, with Shift as its documented keyboard input. Later notes added clearer skill, item, and actor information. Check the current controls if your binding differs. The important habit is to inspect what happened instead of guessing from animation alone. Damage, a failed action, a status application, and a triggered equipment effect can appear close together; the log helps separate their causes.
Do not try to record an entire encyclopedia in your first fight. Choose one question, such as whether the enemy's opening move applies a curse, whether your chosen attack inherits a weapon element, or whether a defensive action contributes a combat point with the equipment you have. Read the relevant entries after the action. If several variables changed at once, do not claim a firm conclusion. Keep the observation narrow enough that it can influence your next choice.
For a useful comparison, repeat a safe action against the same kind of enemy under similar conditions. Note the weapon, important effects, and area. A different curse or a stronger enemy variant can make a supposed equipment test meaningless. You do not need a spreadsheet to benefit from this method. Remembering that a particular change made your ordinary hits reliable is more useful than remembering the largest critical number you have ever seen.
Treat combat points as bonuses with conditions
Historical developer notes describe three combat-point types: Swift, Lethal, and Defensive. Their effects involve avoiding an attack, landing a critical hit, or recovering health and magic, with the relevant counter reset when the effect triggers. Equipment and abilities can contribute points. Current item descriptions are the authority for the exact trigger and amount on your build. This is a system of accumulating opportunities, not a promise that the next action will produce the result you want.
Build around actions you already need to perform. If you regularly use items to stay alive, an item-triggered equipment property can add value to an existing habit. If your plan depends on basic attacks, equipment that rewards those attacks may fit better than a property restricted to rituals you seldom cast. The useful question is how often the condition occurs during your real battles. A powerful description that almost never activates is weaker in practice than a modest effect that supports every encounter.
Never let a possible trigger replace a necessary heal. When your survival requires a dodge, critical hit, or random recovery, the plan has already become fragile. Spend the guaranteed resource while you still have a safe opportunity, and treat a bonus trigger as a way to save supplies afterward. This distinction is especially important while learning a boss, because a lucky first attempt can hide weaknesses that appear immediately when you repeat the same sequence.
Guard with a purpose
Guarding is easiest to understand as a response to danger you expect, rather than a button to press whenever you feel uncertain. Read the enemy's preceding action and any visible setup. If the opponent appears to prepare a large attack, compare the cost of guarding with the cost of healing afterward. A defensive turn that prevents a crisis can be more efficient than spending several later turns repairing the damage. Check the actual effect text instead of assuming a particular damage reduction.
Some equipment can reward guarding through combat-point generation, as documented in the developer's combat updates. That makes a defensive turn potentially useful beyond its immediate protection. However, the equipment must actually have the relevant property. Wearing an unrelated weapon and expecting the same bonus because a guide mentioned it will not work. Read the complete description of the item currently equipped, including any conditions attached to the effect.
Avoid turning defense into an endless stall. If each guarded turn still consumes health or leaves a harmful effect growing, you need a way to change the situation. That might mean using a suitable item, removing an attacker, applying a useful effect, or returning with different equipment before beginning another attempt. Guard should help you reach a better position. If nothing improves after several defensive turns, inspect what resource or mechanic the plan is missing.
Know what your items can actually solve
The historical v0.2.8 update introduced Battle Items that could provide damage, debuffs, and other effects even in situations such as being stunned or dizzy. That history is a reason to inspect the item menu when your usual attack plan is disrupted. It is not a guarantee that every item bypasses every restriction. Read the current item description, check its target and availability, and distinguish a dedicated battle item from an ingredient you happen to be carrying.
Organize your battle supplies by job. Have an ordinary recovery option for routine damage, a reserve for a serious emergency, and any specialized item needed for the problem you are learning. This helps prevent using a rare resource on a harmless enemy simply because it appears near the top of the menu. The reserve does not need an arbitrary fixed size. Base it on the damage you are actually taking and the distance to a safe return.
Count the actions spent using supplies as well as the supplies themselves. A meal that restores more than you need can be wasteful outside danger, while a weak recovery item can be a poor choice when it barely keeps pace with incoming damage. Choose the smallest reliable recovery for a safe moment and the strongest appropriate response for a crisis. The goal is to leave the battle with enough resources for the route, rather than win while emptying the entire bag.
Build a repeatable first expedition
Start a learning trip with a modest destination and one battle question. Prepare your equipment, read your restorative items, and finish any routine work that would otherwise distract you. Fight an encounter you can reasonably evaluate, then decide whether the remaining supplies support another. Do not extend the trip solely because you have already travelled a long way. Previous effort cannot protect you from the next enemy, and returning with useful information is a successful outcome.
Afterward, identify the largest avoidable expense. Perhaps you spent several heals because your accuracy was poor. Perhaps you used expensive rituals on enemies your basic attack could handle. Perhaps you spread damage across a group and allowed unnecessary enemy turns. Fix one of those problems before the next expedition. A small change you can explain is easier to trust than replacing every piece of equipment and hoping the result improves.
If combat is crowding out the parts of Elderfield you enjoy, read the difficulty options. The official store explicitly describes a cozy option intended for a more relaxed experience. There is no requirement to turn every farming session into a difficult battle project. Choose the setting that supports your goals, and revisit the tactical systems when you want them. A sustainable routine produces more progress than repeatedly forcing a level of challenge that has stopped being enjoyable.
A practical decision order for difficult turns
Read the immediate threat first, then the resources that remain, then the damage you can deliver reliably. This order matters because it prevents an attractive attack from distracting you from a lethal situation. When health is safe, look for a target you can remove. When the group cannot be reduced, consider whether a protective or disruptive action creates a better following turn. When the battle is already under control, preserve expensive magic and supplies for the unknown encounters ahead.
After a failed attempt, describe the failure in one plain sentence. Examples include running out of usable recovery, losing an action to a harmful effect, or leaving a second enemy alive for too long. Each description points toward a different correction. Buying a stronger weapon may solve the last problem but do little for an item shortage or a missed status interaction. A good post-battle review turns frustration into a specific preparation task you can complete back in town.
The aim is not to find a universal sequence that ignores the opponent. It is to make your choices understandable enough that you can adapt when a new creature or equipment property appears. Read, choose, observe, and revise. That approach remains useful when balance numbers change, when you switch difficulty, and when an old demo guide no longer matches the release build on your screen.
A quick comparison that improves the next turn
Before the next ordinary fight, compare two ways to finish a weakened target. One may use an expensive ritual immediately; the other may use a basic attack and retain magic. If both are reliable and allow the same number of enemy actions, the cheaper option has a clear advantage for a long route. If the cheaper option risks leaving the enemy alive, the stronger action may earn its cost. This comparison turns resource conservation into a concrete battle decision rather than a rule that special abilities should never be used.
Make the same comparison when a second enemy remains. The finishing action may remove an entire source of pressure, which can save a later heal. That is why the last portion of an enemy's health matters disproportionately. You are buying the absence of its next action, not merely subtracting another number from a bar. Look for that opportunity before spending an action on a small improvement that leaves the full group active.
Sources & further reading
Mechanics are compared across cited sources; older-build differences are stated in the articles.