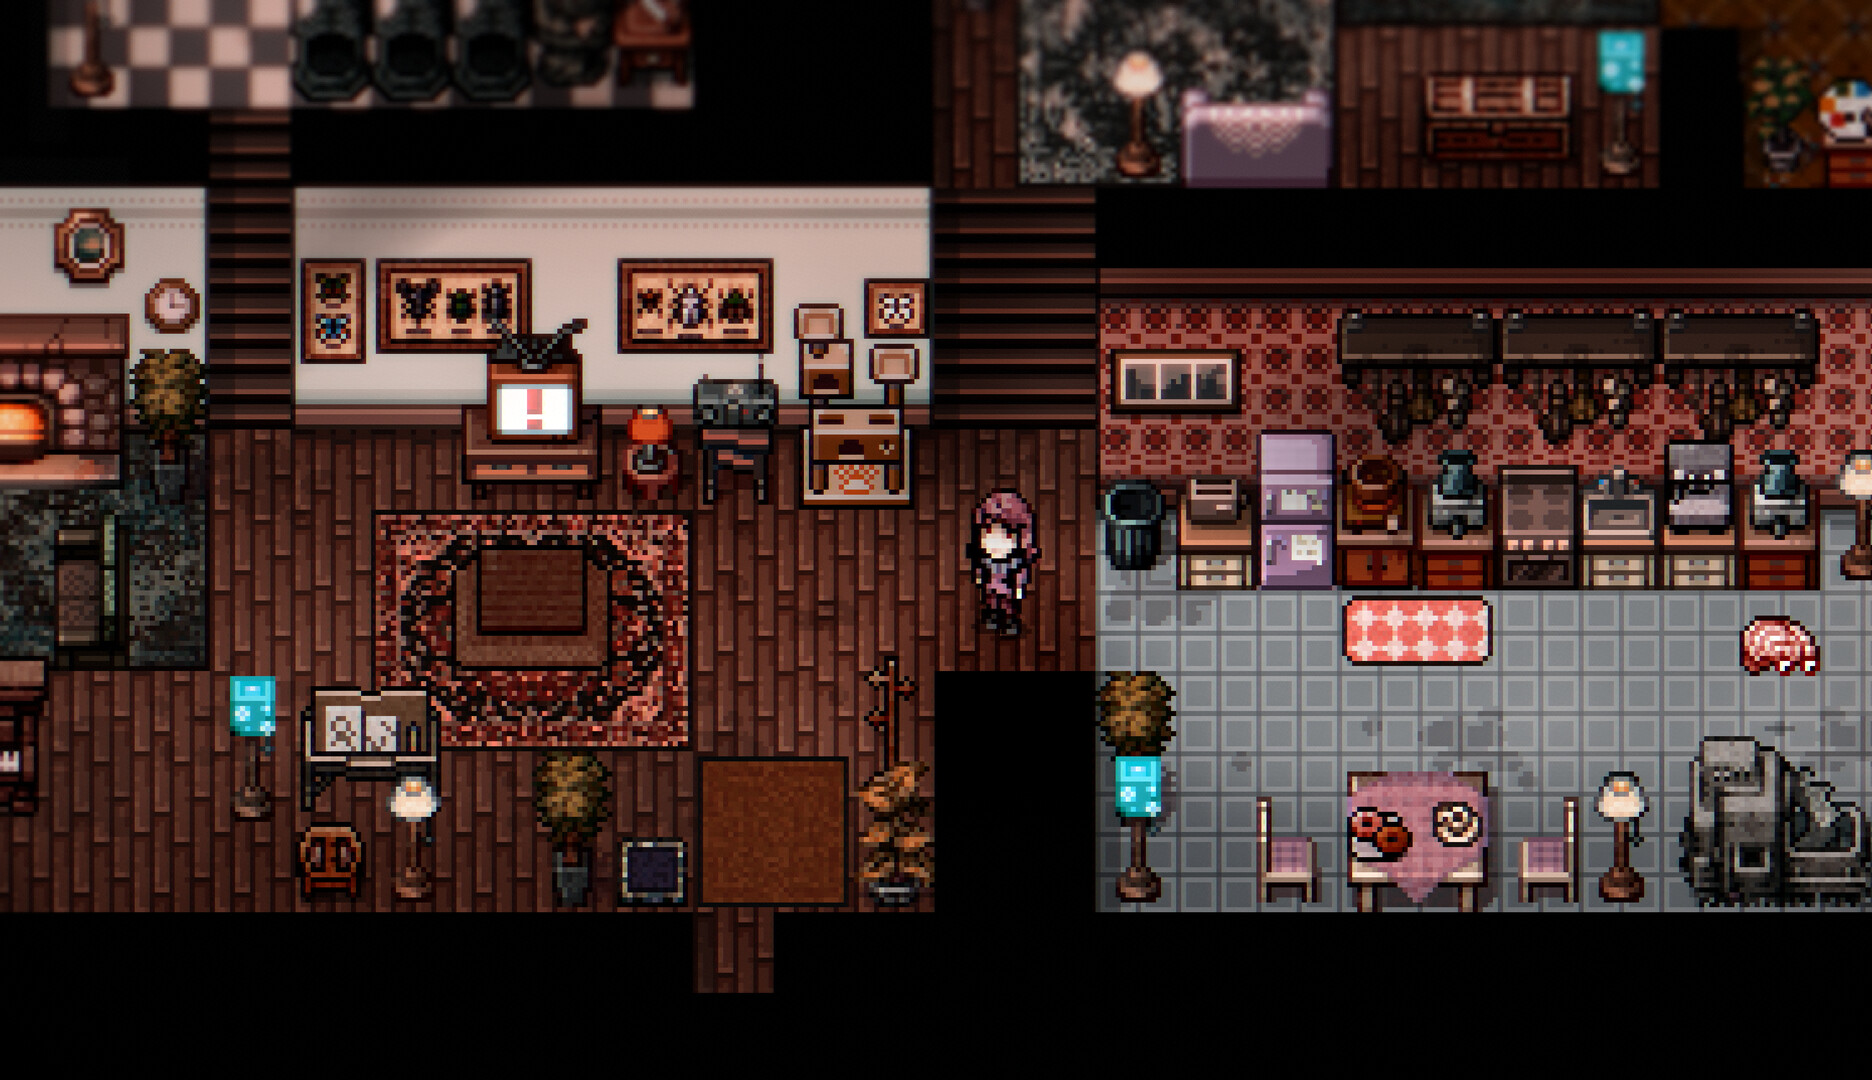
Design around the things you use every day
Your Elderfield home is more than a place to display furniture. Community town documentation identifies recovery, cooking, storage, saving, appearance changes and news among its uses. Arrange the room around those repeated actions first. A beautiful layout that makes every return awkward will soon feel inconvenient, while a clear route through the useful objects gives decoration a structure to build on.
Begin by walking through your ordinary home routine and noticing where you stop. Leave the path between those points easy to recognize and interact with. Then decorate the spaces around it rather than filling every visible gap immediately. This is a design recommendation, not a claim that the game awards an efficiency bonus for a particular layout. The benefit is practical: you can return from an expedition, recover and prepare the next task without having to remember which small object is hiding the interaction you need.
Move what you already own before buying more
The community home description says existing furniture can be rearranged. Use that freedom to test the room before spending resources. Move a large piece, check the walking route and decide whether the space needs another object at all. Often a room feels unfinished because its pieces are scattered rather than because it lacks enough furniture. Grouping what you have can create a deliberate corner without a shopping trip.
Choose one focal area for the first pass, such as a sitting space or a kitchen-adjacent table. Arrange the larger pieces there, then leave the rest of the room simple until you see how the composition feels during play. A limited first project is easier to finish and revise than a complete house redesign. Once the focal area works, use its colors and materials to guide the next purchase. That gives the eventual collection a consistent character instead of a row of unrelated bargains.
Read the item category before expecting a function
The launch decoration reference lists objects such as an Espresso Machine as clutter, while the crafting directory separately identifies functional production stations. An object that looks like an appliance may therefore be decorative rather than a recipe-producing machine. Check the use description and placement category before buying it to solve a cooking or processing need.
This distinction prevents a very concrete mistake: spending money on a good-looking prop and then searching for a production menu it was never meant to provide. If your goal is making coffee or processing ingredients, begin with the recipe and required station. If your goal is making the kitchen look lived in, the decorative appliance may be exactly what you want. Both purchases are valid, but they answer different needs. Keep the intended use clear while browsing a shop with many visually similar objects.
Check where an object can be placed
The decoration list distinguishes placement areas and surfaces. Some small objects accept floors and tables, while others are limited by their category or location. Before building a whole arrangement around a particular piece, read those notes and test the placement. A home-only object is not automatically suitable for the farm, and a surface decoration may need a compatible support.
Place the larger furniture first and add small objects afterward. That makes it easier to tell whether a clutter piece is the wrong size or simply on the wrong surface. If placement fails, check the item rule before repeatedly shifting everything around it. The room can usually be adapted once you understand the constraint. Avoid buying several copies of an unfamiliar item until you have confirmed that it fits the place you intended. One test purchase is enough to answer that question.
Browse the Carpenter with a short list
Stan's furniture selection is described as rotating daily in the launch shop reference. A missing item on one visit does not mean you are at the wrong shop. It means you should check the stock condition and return on another suitable day. Make those visits part of nearby errands when possible, rather than spending every day solely on furniture browsing.
Keep a short list of functions or shapes you need: one chair for the reading corner, one small table, one suitable light. This gives you room to accept an alternative that fits the design. If you insist on one exact object before the room can work, rotating stock can leave the project stalled unnecessarily. Save that insistence for a truly central piece. For the rest, choose items that share the room's tone and leave enough money for the farm and equipment you still need.
Set a decoration budget after essential spending
Decide what you can spend before opening the furniture counter. Keep seed money, recovery supplies and a current crafting reserve separate from optional decoration. This does not mean that decorating must wait until every other goal is finished. It means choosing a size of project that fits the stage of your save. A small finished corner can be satisfying while a large house expansion remains a future plan.
Use the same discipline with crafting materials. Wood, Wax, bars and other resources can serve both cosmetic and practical recipes. If a decoration consumes the last component of an important workstation, recognize the tradeoff before confirming. You may still choose the decoration, but it should be a deliberate choice. A budget helps you enjoy the home without discovering afterward that the new arrangement has postponed the tool or food production you needed for the next outing.
Check recipe availability before gathering
The furniture recipe reference includes an availability field distinguishing recipes known from the start from those learned later. If an object does not appear in your list, owning its ingredients may not be enough. Check whether you have learned the recipe and whether you are using the appropriate crafting category. This is a different issue from being short of materials.
Choose one craft and inspect its full chain before gathering. A piece that requires a processed plank or another intermediate material needs more than the raw resource named in your memory. Confirm the exact item names and any supporting recipe. Then gather for the whole craft rather than returning with a partial ingredient set. This approach works particularly well for decoration because the visual goal is already clear: you know exactly which object will finish the corner and can avoid accumulating materials for several projects you have not committed to.
A small crafted outdoor project
The launch furniture list includes simple wooden decorations alongside more elaborate objects. A modest bench or post can be a useful first project when you want to make the property feel intentional without spending scarce metals. Check the current recipe and placement permission, then build one piece and inspect it in context. Do not assume that the cheapest object needs to be repeated across every edge of the farm.
Use a few objects to suggest a purpose: a resting corner, a marked entrance or a small work area. Leave access to the actual farming and production interactions clear. The visual effect comes from grouping and spacing, not necessarily from a large quantity of crafted items. If the first arrangement feels cluttered, move or remove a piece before making more. Iterating with a small number of objects preserves materials and makes it easier to see which addition genuinely improves the scene.
Make small objects tell a coherent story
Clutter works best when it belongs to the activity suggested by the furniture. A reading corner can use paper, a cup or writing objects. A dining area can use plates or a basket. A strange collection shelf can display one unusual object with enough space around it to remain visible. The launch item list gives several such small decorations, but you do not need all of them in the same room.
Avoid placing an object on every available surface simply because the placement system allows it. Small gaps make the remaining pieces easier to read, especially in Elderfield's detailed hand-drawn style. Choose a few items that agree with the corner's purpose and stop when it feels complete. If a rare object is the focus, keep nearby clutter quieter. This is a visual planning recommendation rather than a hidden scoring rule; the reward is a room that looks intentional while remaining easy to use.
Plan seasonal furniture as a collection, not an emergency
The launch shop reference identifies different decoration selections during the Harvest Festival and Witch-season stalls. The community news page also describes Carnival of Souls rewards that include ghostly furniture. If one of those styles appeals to you, plan the space and budget before the event. Knowing whether you want a chair, table or larger centerpiece helps you choose among temporary offerings.
Confirm current stock and event prices in the game. An older table can establish that a themed reward exists without guaranteeing its exact cost in your version. Buy the piece that completes your intended room rather than assuming you must clear the entire event inventory. If you cannot afford everything, preserve the plan for another opportunity and finish the room with ordinary pieces in the meantime. A seasonal collection should give you a goal, not make the house feel unusable until every matching object is obtained.
Understand cosmetic pets before buying one
The older community town description treats pets as cosmetic placeable companions and says they do not require feeding or upkeep. Because that description predates release, verify the current item and interaction before relying on it. In particular, do not confuse a decorative pet with ranch livestock or assume it will produce resources. The two purchases serve different parts of the game.
Place the pet where you want it before choosing its final name. The September 1 demo update allows pets of the same kind to have different names, but picking up a pet resets its name. The update also required existing pets to be renamed after migration. If a name disappears immediately after rearranging the room, check this interaction before assuming the save lost unrelated progress. Walk the route past the placed pet and confirm that nearby furniture remains usable; then rename it after the layout is settled. A larger pet collection is easier to arrange when you finish placement before naming each companion.
Upgrade for a plan you can describe
Klaus is associated with home upgrades in community documentation. Before paying for more space, decide what the current home cannot comfortably support. You may want a separate production area, a larger collection display or room for a household change. A clear use makes the upgrade easier to evaluate than buying it simply because it is the next available option.
Inspect the current cost and requirements in the game rather than trusting an old numerical table. Then reserve the materials without disrupting essential equipment or farm work. After upgrading, arrange the useful objects first and decorate the new area in stages. More space can make a room feel emptier at first, which is not a reason to fill it immediately with whatever is cheapest. Give the expanded home a purpose, then acquire the pieces that serve it.
Decorate after the spouse room appears
The launch marriage reference says the spouse's room is added at the next midnight update after the wedding. If marriage is imminent, keep the existing arrangement flexible until you have seen that addition. There is no need to guess its appearance or dimensions from someone else's screenshot. Let the update complete, inspect the new household and then decide which of your pieces should move.
This is also a good time to reconsider the home's focal areas. A room that worked well for a solitary farmer may feel better with a shared sitting space or a different display corner. You can make that visual change without assuming the spouse needs a particular unverified furniture score. Follow the actual placement and interaction rules, and use the redesign to mark the new stage of the save. The purpose is a home you enjoy returning to, not an invented marriage-performance requirement.
Test the finished home during ordinary play
After decorating, use the home through a normal return from an outing. Access storage, prepare what you need, check the news or journal and move toward the exit. If any part feels awkward, adjust it before adding more detail. A layout can look excellent in a still image yet be inconvenient when several small objects compete for interaction. Practical testing reveals that immediately.
Take a screenshot if you want to compare versions, but keep the final decision based on how the room feels while you play. Remove a distracting item, widen a visual gap or move a decorative prop away from a functional station. Once the arrangement works, stop shopping for that corner until you find something that clearly improves it. Finishing is part of good decoration: the home should become a comfortable base for the rest of Elderfield, not an endless source of unrelated purchases.
Try one evening with the new arrangement before committing to more matching furniture. Repeated trips through the room reveal whether the centerpiece is in the right place and whether its color works with the objects already present. If you immediately want to move it after every return, solve that issue first. A short trial costs nothing and can save a larger purchase that would only repeat the same layout problem.
Sources & further reading
Mechanics are compared across cited sources; older-build differences are stated in the articles.
- Official customization description ↗
- Home and pet documentation — older community reference ↗
- Clutter and Small Decorations ↗
- Furniture and Decoration Recipes ↗
- Farm, Building and Utility Recipes ↗
- Seasonal reward reference ↗
- Official demo v0.11.17 update, September 1 ↗
- Official September demo and release announcements ↗